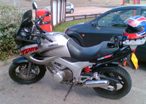
First you’ve got to set your springs up
You can’t compensate for too soft or too hard springs with more or less damping
More or less preload will not make the springs harder / softer, they will only raise or lower the bike but it does have an effect on the feel of the suspension though (in reality, if you add 20mm of preload, the last 20mm of travel will be stiffer as it will require more force and hence why it feels it has made the suspension firmer)
The way to check if you have the correct strength springs is by measuring ‘sag’
A heavier rider will require stronger springs and vice versa a lighter rider will require weaker springs on the same bike
Motorcycle manufacturers have got a hard time and at best can only choose compromise for an average weight rider. If you’re not the same as the average weight rider they have chosen then the springs will be wrong, and the springs have a fairly narrow range rider weight that they will be correct for.
Sag
Terminology
Static sag – how much the suspension compresses with just the weight of the bike from fully extended (ie with the wheels off the ground)
Rider or dynamic sag – how much the suspension compresses with the weight of the bike and rider aboard
Loaded sag – is merely a calculation of rider sag minus the static sag to see how much the weight of the rider is compressing the springs
Front
Best method is to put a ty-rap around the fork stanchion
Measuring Static sag
Lift front wheel off the ground, and push the aforementioned ty-rap down to the dust seal on the top of the fork slider (for right way up forks on like on the TDM)
Gently lower the bike onto its wheels without it bouncing, then lift the wheel off the ground again
Measure distance from dust seal to bottom edge of ty-rap
Measuring Dynamic sag
Same as Static but this time with you sat on the bike – again do not bounce the suspension
Calculate the loaded sag by subtracting the static from the dynamic
Figures you are aiming for are (these are based upon sports bike suspension (120mm suspension travel), but as the TDM has a slightly longer suspension travel these may be a bit on the hard side
Static Sag 15-20mm
Dynamic sag 30–35mm
Loaded sag 10-20mm
So the MkII TDM850 front suspension travel is 150mm, so the following is probably a better starting point
Static sag you want is 60 – 70% of the dynamic sag
TDM850 MkII = 22.5 to 31.5mm
Actual Dynamic sag you want is 25 – 30% of full suspension travel
TDM850 MkII = 37.5 – 45mm
Actual Loaded sag range = 6.5 – 22.5mm
Rear
You will need a helper to do the rear
To do the rear you need to measure (with a tape measure) from the rear spindle or edge of swingarm (it doesn’t really matter) to a point on the rear of the bike, vertically upwards
If necessary, a piece of masking tape with a cross marked on it, stuck the tail piece will suffice. It must be vertical else you will get false readings
Do the sag measurements as per front above
Figures you are aiming for are
Static Sag 5-10mm
Dynamic sag 30–35mm
Loaded sag 20-30mm
Again, these are based upon sports bikes with shorter suspension travel than the TDM
MkII TDM850 has 144mm of rear suspension travel, so the following may be a better place to start
Actual static sag you want is 15 – 25% of the dynamic sag
TDM850 MkII = 5.5 to 11mm
Actual Dynamic sag you want is 25 – 30% of full suspension travel
TDM850 MkII = 36 – 43mm
Actual Loaded sag range = 25 – 37.5mm
What to do if you can’t get the Sag figures correct
If you can’t get the sag figure correct using the preload adjustment provided then the spring rates are incorrect for the bike / rider weight combination & different springs are required
Spring Rate OK - Static, Dynamic and Loaded sag within acceptable range.
Spring Rate too soft - 1) Loaded Sag too much or
2) Static OK but too much Dynamic Sag or
3) Dynamic Sag OK, but too little or no Static Sag
Spring Rate too hard –1)Loaded Sag not enough,
2) Static sag OK but Dynamic Sag not enough or
3) Dynamic Sag OK, but too much Static Sag
Damping
Its important to realize that there are no right and wrong damping settings
What works for you may not work for someone else
Damping must match the spring & preload settings.
Stiffer springs / more preload, will require more rebound damping and vice versa
Compression damping
This controls how fast the suspension compresses such as under braking and when hitting a bump
There are two type of compression damping, Hi speed and Lo speed, but this relates to the speed of suspension movement, not the speed of the bike, but this is too really getting technical, so don’t worry about it at the moment
Rebound damping
This control how fast the suspension returns back after being compressed from hitting a bump or after braking
Setting the damping
Front Compression
Usually a screw at the bottom of forks adjusts the compression damping – MkII 850 doesn’t have one, so ignore this
Front rebound
Screw at the top of the forks, in the cap – winding in the adjuster adds rebound damping
Best way to initially set rebound is to push up and down on forks. Forks should return promptly to original height but not overshoot
Rear compression
Adjuster usually on the remote reservoir.
TDM850 doesn’t have this so don’t worry about it
Rear rebound
Usually an adjuster at the bottom of the shock
On the TDM, turn adjuster knob anti clockwise when looking down on bike to add more damping
Rebound adjuster also affects the compression damping slightly on the TDM (cheap shock!)
Symptoms of incorrect damping (these are simplified as it can be quite complex)
Front Compression
Too much –front end feels harsh and solid
Too little – front dives too much under braking or when hitting bumps. Front end has a mushy and semi-vague feeling, and may bottom out upon impacts/bumps in road.
Front Rebound
Too much – front feels harsh (forks pack down as they can’t recover fast enough)
Too little – front feels like it wants to wash out, on corner entry
Rear Compression
Too much – rear feels harsh or solid over bumps
Too little – shock bottoms out on relatively small bumps (do not add more compression to compensate for soft springs)
Rear Rebound
Too little – rear end wallows in the corners (rises up and down)
Too much – rear feels harsh as it packs down.
Press down on rear of bike – suspension should return promptly to original position without overshooting.
The TDM850 can be set up for solo and pillion use with good results
Forks
15wt oil to level as per the manual (note this is measured without the springs fitted)
Std springs are very soft, but addition of 25mm preload spacer (inside the forks, between the spring and the fork cap) works quite well
With this, the preload adjuster comes back into range and you should be able to get the sag within the acceptable range
For two up use the front settings don’t really need adjusting once set, when swapping from solo to two-up
Rear Shock
Spring preload – I actually increased the spring preload by means of the collars on the bottom of the shock – shock needs to come out really, but can be achieved in situ with a hammer and an old screwdriver
For solo
Use rear spring in S position – rebound damping adjuster 7-8 out clicks out from fully in
Two-up use
Use spring in H position - damping adjuster fully in / 1 click out depending on how the compression damping feels (maybe too harsh compression damping on max)
Edited by GuyGraham, 16 August 2009 - 05:12 pm.


