Jump to content


Photo

Dobeck Performance "tfi-1025" Efi Tuner For The Tdm900

jerk stutter chug slow buck throttle EFI fix tune tuning

  • Please log in to reply
181 replies to this topic

#61 AzzA

AzzA

    Knows more than an horses arse!

  • Member
  • PipPipPipPipPipPipPipPip
  • 1,548 posts
  • Location:Royston Vasey, Victoria , Australia
  • TDM model: 2009

Posted 29 October 2012 - 11:41 pm

G'day Nick,

4.3 sounds too high; somewhere between 2.0 and 4.0 is more like it. (I think mine is around 2.5-2.75, but don't quote me, I didn't have my googles on at the time.)

Try this, slightly alternate method... warm the bike up to temp' and then set the green pot' to 1.0... then blip the throttle, to check for hesitancy, and add a bit (0.25 - 0.33) until it starts to hesitate... then back it off gradualy until there's no hesitancy. It's like setting the pilot/primary jets on a carby... find the point it goes too rich and then back off from it.

Or what they say:
"
Green Fuel Pot: (functions like a fuel mixture screw on a carburetor)
Adjusts for the motorcycle's fuel requirements during light load operation, from idle through legal highway cruising speeds and steady throttle, at or below the rpm set by your rpm set pot. We have found that manufacturers have generally leaned out the fuel mixtures for emissions to a specific rpm (see below). To set this pot, make sure the motorcycle is up to a full operating temperature, then while in neutral, pick a fast idle that is not easy to hold a steady rpm (V-twins 1800-2200 rpm and multiple cylinders 2500-3000 rpm), hold the throttle at that spot and then slowly and evenly turn the green pot clockwise from its minimum setting, while listening to the exhaust sound. You should hear the exhaust sound change form an irregular and uneven sound to an even and smooth one. You may also see an increase in rpm as you increase fuel, and if you continue to increase fuel past this point to where the revs start to fall back away, then you can stop and start returning the pot screw back to a point half way between where the exhaust note first smoothed out and the point where the highest rpm starts to fall away.
"

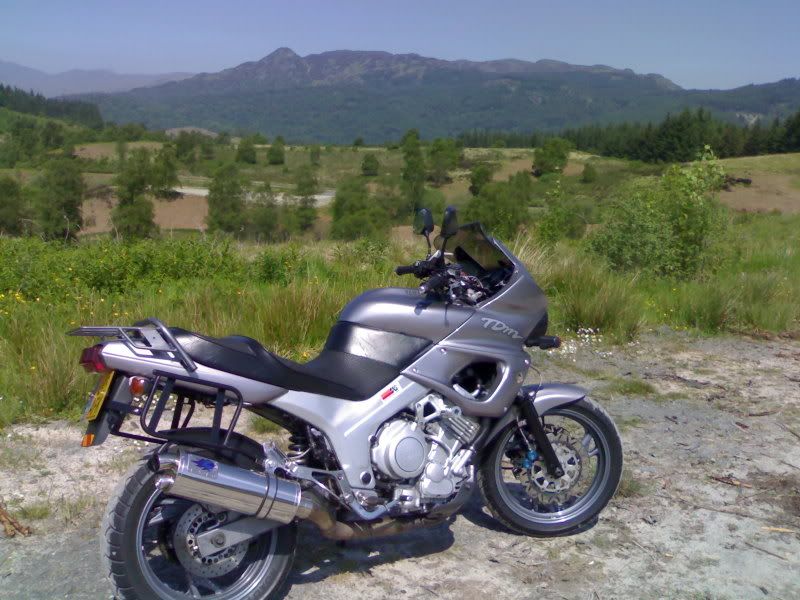
Front springs are Hyperpro, they bloke that sold them to me is one of the men behind YSS, he also sold me a Wilbers rear shock... from speaking to him, I get the distinct impression that all those brands are made on the same plant and the differences are only cosmetic and for branding. All that aside... the ride result is brilliant! I now get front travel without jarring and there's practically no dive. I was running OEM springs with almost full pre-load, now with the progressives there is almost no pre-load and the travel is smooth without jarring. The OEM springs are dual rate, if you're over 100kg and have a lot of pre-load you get to the second spring rate very quickly on our rough B & C roads (some of our A roads aren't flat either). Money well spent and it's no more difficult than changing the fork oil.

Edited by AzzA, 29 October 2012 - 11:47 pm.

gallery_10460_302_12664.png


#62 OldGit

OldGit

    Carpe Regular

  • Member
  • Pip
  • 133 posts
  • Location:NW Kent, UK
  • TDM model: 2002

Posted 30 October 2012 - 08:27 am

Cheers fella. I had hyperpro on my v-strom a few years back agree with you they are quality.
Alright Brain, you don't like me, and I don't like you. But lets just do this, and I can get back to killing you with beer.

#63 TKH

TKH

    full o shoite

  • Member
  • PipPipPipPipPipPipPipPip
  • 2,199 posts
  • Location:Preston, NW England
  • TDM model: 2008

Posted 04 November 2012 - 10:29 pm

My dobeck unit finally turned up. I went for the plug and play one rather than hacking into my wiring loom. BIG mistake. I'm not having a go at the Dobeck unit here but it connects straight on to the injectors. For the two or three of you who haven't worked that out.....

Remove fairing & screen
remove fuel tank
remove airbox
remove fuel rail
remove injectors
unplug
plug in new wiring
put it all back together and hope you haven't missed something

I now understand why Dobeck recommend the tap on version on their site!!

#64 AzzA

AzzA

    Knows more than an horses arse!

  • Member
  • PipPipPipPipPipPipPipPip
  • 1,548 posts
  • Location:Royston Vasey, Victoria , Australia
  • TDM model: 2009

Posted 05 November 2012 - 02:02 am

I think I might have mentioned the differences of the two units earlier, if not, I had intended to. The upside of the extra work, for plug'n'play, is that your loom will not be adulterer in any way... should that be your aim or wish.

You can get by without removing the screen... just remove the seat, the side fairings, the frame covers and unbolt the tank. Then remove the two out-most screws in the dash surround; to allow it to flex more. You can then carefully lift the tank with one hand and gently stretch the dash panel out of the way. A handy friend might help, and it's a good idea to have something to support the tank with... occy straps and wood are mentioned in the KB here, I usually use the strap method, just be careful not to lift the tank too far rearward or you will bend the seat bracket at its rear.

Clean or replace your air-filter while you're in there, if it's anywhere near due.... and give it all a squirt of ACF-50 or your favourite long life goop; coz no-one need be in there again for ages.

After all that fuss... please let us know how it goes.

gallery_10460_302_12664.png


#65 gabby

gabby

    really likes Carpe

  • Member
  • 95 posts
  • Location:Adelaide, Australia
  • TDM model: 2009

Posted 05 November 2012 - 10:52 am

My dobeck unit finally turned up. I went for the plug and play one rather than hacking into my wiring loom. BIG mistake. I'm not having a go at the Dobeck unit here but it connects straight on to the injectors. For the two or three of you who haven't worked that out.....

Remove fairing & screen
remove fuel tank
remove airbox
remove fuel rail
remove injectors
unplug
plug in new wiring
put it all back together and hope you haven't missed something

I now understand why Dobeck recommend the tap on version on their site!!


TKH, you won't need to do all that. Don't remove the airbox. I have just now installed my EJK. Have only run it at idle for now but it works and it's not hard to fit. Lift the tank and you will see the injectors connector near the left frame behind the air box. (One connector splits into two injectors in the loom that runs behind the injectors. So only one connector and you will easily see which). The earth wire will reach back to the battery. G

#66 TKH

TKH

    full o shoite

  • Member
  • PipPipPipPipPipPipPipPip
  • 2,199 posts
  • Location:Preston, NW England
  • TDM model: 2008

Posted 05 November 2012 - 09:26 pm

TKH, you won't need to do all that. Don't remove the airbox. I have just now installed my EJK. Have only run it at idle for now but it works and it's not hard to fit. Lift the tank and you will see the injectors connector near the left frame behind the air box. (One connector splits into two injectors in the loom that runs behind the injectors. So only one connector and you will easily see which). The earth wire will reach back to the battery. G


I've looked all over and can't see anything that will connect.

This is under the tank of my 9'er


Put in twice for some reason?

Edited by TKH, 05 November 2012 - 09:45 pm.


#67 AzzA

AzzA

    Knows more than an horses arse!

  • Member
  • PipPipPipPipPipPipPipPip
  • 1,548 posts
  • Location:Royston Vasey, Victoria , Australia
  • TDM model: 2009

Posted 06 November 2012 - 02:30 am

Any chance you blokes could post some pictures of the EJK?

It's a bit hard to visualise from the descriptions alone.

Obviously the instructions from the manufacturer are generic; not specific to the TDM900. Which would stand to reason; they're US based where there is no TDM900. The same unit probably fits a number of Yamaha twins.

EDIT:
This seems to be a problem with the EJK instructions; they're too vague.
Please let us know how it all goes together, and maybe I can get it fixed. I have swapped emails with a member of the R&D team and will let him know of your findings. If nothing else the information will be here for all to see.

Edited by AzzA, 06 November 2012 - 02:34 am.

gallery_10460_302_12664.png


#68 gabby

gabby

    really likes Carpe

  • Member
  • 95 posts
  • Location:Adelaide, Australia
  • TDM model: 2009

Posted 06 November 2012 - 11:22 am

Here we go fellas, some photos.
This is the EJK complete.
Attached File  DSC00853.JPG   131.7KB   56 downloads

Here is a view with the tank raised. The four-wire white connector inside the left frame rail is for the injectors.
Attached File  DSC00847.JPG   137.03KB   75 downloads

The blue wire in this connector is nothing to do with injectors and the EJK just connects this through. The other wires (at least in mine) are Green/Black (injector 1), Red/Black (injector 2) and Red/Blue (injector common).
So you just pull this apart:
Attached File  DSC00850.JPG   135.08KB   70 downloads

Then the EJK basically just fits in-line there:
Attached File  DSC00852.JPG   127.35KB   48 downloads

The black ground wire will reach back to the battery negative terminal. Then cable tie the main EJK loom securely back to under the seat. From there you can temporarily mount it on the tank for tuning runs or you could run it to the front of the bike if required.

Mine hasn't been run outside the shed yet but will add any other findings when I get it out to experiment. G

#69 AzzA

AzzA

    Knows more than an horses arse!

  • Member
  • PipPipPipPipPipPipPipPip
  • 1,548 posts
  • Location:Royston Vasey, Victoria , Australia
  • TDM model: 2009

Posted 06 November 2012 - 03:04 pm

Ah... I see... the injectors are switched by "open collector" outputs on the ECU and the Red/Blue wire is a constant +12V supply, and this is where the EJK gets its positive connection. Hence it only needs one plug, as a via, and a negative connection to the battery. Simple really... just a shame that the connector is in such a bastard of a position. Without looking at my bike, I'm guessing it's just too far out of reach if you tried to access it via the frame cover (without lifting the tank)... even if you don't have sausages for fingers.

If you have a wiring diagram the white four pin plug is plug "A" for "Sub-Wire Harness 1". The blue wire that passes through that connector is for the Throttle Position Sensor and the Intake Air Pressure Sensor.

Thanks Gabby,

I can see how people can get lost in the spaghetti bowl under the tank. :)

Are you planning on cancelling the O2 sensor, or are you going to try tuning with it still in circuit?

gallery_10460_302_12664.png


#70 TKH

TKH

    full o shoite

  • Member
  • PipPipPipPipPipPipPipPip
  • 2,199 posts
  • Location:Preston, NW England
  • TDM model: 2008

Posted 06 November 2012 - 06:29 pm

Ok that's not the same as the unit I have. Mine has a lead for each injector. I'll talk to Dobeck and see what they say. Once I have the full picture and a working bike I'll let everyone know what I did and how/why.

#71 gabby

gabby

    really likes Carpe

  • Member
  • 95 posts
  • Location:Adelaide, Australia
  • TDM model: 2009

Posted 06 November 2012 - 09:44 pm

Azza, your assumptions on the injector switching are correct I think. You or another member might be able to help me with something that has me perplexed though.

I intend disconnecting the 02 sensor eventually, as to have it connected with a fuel controller of this type would see it and the ECU fighting each other I think and the whole exercise might be pointless. Before doing any of these mods I wanted to have some idea of what the sensor was doing - I'm curious and it's good to know what you have before you change anything. I tapped into the O2 sensor cable and connected a meter to see what the sensor was generating.

As expected, the voltage was near zero when cold then increased over a few minutes as the engine warmed up. When it was at operating temperature the sensor voltage was around 950mV. This seems very high and indicates a rich condition. I thought that it might operate in an open loop mode by design at idle since it obviously wasn't being controlled with a setpoint where you would expect it to be. No idea on that one.

Then the weird thing was that as I increased the revs off idle, the sensor voltage decreased rapidly such that from about 1700rpm it read around 60mV. No matter what rpm was held steady above idle, the sensor was at this very low voltage. I don't know right now what the Lambda should be even at optimum fuel economy but that seems off the scale.

But when the engine was stopped, the sensor reading jumped up to several hundred mV again when sensing the still gas in the exhaust; It was reading the gas and I proved it by blowing into the exhaust and it cleared.

So this makes me think that at higher gas flow rates the sensor is not actually sensing anything. No idea on that one - any clues?

And while I haven't done it yet, I was wondering if disconnecting the O2 sensor brings up a fault code, but nobody has mentioned it anywhere in this discussion. The section on FI in the manual has a table of fail-safe actions that the ECU takes on various faults. The action on failure of the O2 sensor is blank. So it doesn't say whether it runs rich or lean or what sort of value it aims for in an open loop fail-safe mode.

The bike is running fine so all this makes me think this is such a dumb fuel injection setup that it probably doesn't even know it has an O2 sensor, let alone use it. Now I'm more determined to get this box of tricks into service and see what it can do.

#72 AzzA

AzzA

    Knows more than an horses arse!

  • Member
  • PipPipPipPipPipPipPipPip
  • 1,548 posts
  • Location:Royston Vasey, Victoria , Australia
  • TDM model: 2009

Posted 07 November 2012 - 02:21 am

The only way to really check an O2 sensor is with an oscilloscope, and I was going to measure mine but decided it wasn't worth the hassle of dragging my old CRO out of storage; the signal should be an oscillation centred on the following ranges:
O2 sensor:
0.2Volts (Lean) - 0.9Volts (Rich)
0.5Volts = stoichiometric

This site has a test on a narrow band O2 sensor LINK and there's plenty of others via Google search.

I didn't bother testing mine because the results with the TFI tuner were so positive... the only conclusion was the original set-up was not working as intended and the most likely culprit was the sensor.

I have now disconnected and removed the O2 sensor completely, and blanked the hole in the exhaust with a stainless plug (from the vendor linked a few pages ago). Remove the outer front sprocket cover and you can remove the sub-loom for the sensor and unplug it from behind the left frame cover. I have plugged in a spare plug that I blanked off to keep the water and dirt out, but you could just use tape or cut the wires as they leave the plug (if you don't foresee ever wanting to replace the sensor). The plug is available from Eastern Beaver "Description:2P090WP-SL-Male Connector L, Item no:2P090WP-SL-M-L" if you're fussy... LINK.

There is no fault code displayed with the sensor removed.

When I removed the sensor the ECU set the AFR to very lean; I then used the TFI to set the AFR by adding duration to the injector pulses with the green pot; that's all the TFI does, it adds fuel. (Just what is needed.) The yellow and red pots are conditional settings; they add even more fuel when activated by acceleration (yellow) or very high RPM (red). Other than that the fuel map is still controlled by the ECU so, unless you're making radical changes to the engine, it should cope well with most bolt-on modifications (like exhaust and air filter).

EDIT:
If you do try to set the AFR with the green setting and the O2 sensor is still connected then the two systems will be in competition and the result will likely be unstable. So if the O2 sensor is in circuit you must set the green setting to zero.

Edited by AzzA, 07 November 2012 - 02:25 am.

gallery_10460_302_12664.png


#73 TKH

TKH

    full o shoite

  • Member
  • PipPipPipPipPipPipPipPip
  • 2,199 posts
  • Location:Preston, NW England
  • TDM model: 2008

Posted 07 November 2012 - 09:35 pm

Mine is now fitted. :yeahbaby: I've got the FI-2054st from a place in California. I'd asked him if it was the same as the 1025 and was told it's the plug and play version. When it came I checked with Dobeck support who told me that I had to switch the wires round on the injector connectors. That was easy but getting at them meant (as previously stated) getting the tank and airbox off. If anyone has one of these and wants any detailed help, PM me otherwise I'd say not to buy this one but get one of the others that Dobeck do. I also undid the airbox mod and returned the CO settings to their original.
I've set mine up as per their instructions which was fairly painless. I've installed it in the same place as AZZA, behind the ECU and took AZZAs advice and cut the O2 sensor wire. I've not put up any piccies 'cause I don't recommend buying the FI-2054st. If I'd have know the hassle I was in for I wouldn't have bought it, there are much easier options in this post.
I went on a shortish run tonight that had slow corners/roundabouts, 30 speed limit and motorway. I found it ok. No issues on motorway. There's a bit more pull lower in the rev range and it's a bit smoother pulling from low revs ~2200. So does what it says on the tin. I'm letting this settle in before trying putting the airbox mod back on to see if it makes any difference.
When I made the original changes to mine I did the airbox mod, K&N airfilter and upped the CO setting by 5 on each side. That made a difference on MY bike. Whether it'll make a difference on other people's bikes I don't know mine is an early 2008. If you got the readies the Dobeck unit is worth it I think and I was skeptical at first. If you're a bit strapped or think that £115 is too much then try what I did first. Other people have had varying success with other mods as well.
One last thing, I don't know if it's just me but the bike feels smoother. It could be the thick winter gloves I'm now wearing so I'll give it a go with my summer gloves sometime as I get much more feel for the throttle with them.
Guess I'll have to wait for the MPG figures to come back before I start really getting excited! What a good excuse for a nice long ride this weekend!

#74 AzzA

AzzA

    Knows more than an horses arse!

  • Member
  • PipPipPipPipPipPipPipPip
  • 1,548 posts
  • Location:Royston Vasey, Victoria , Australia
  • TDM model: 2009

Posted 08 November 2012 - 01:26 pm

Glad you got it sorted TKH,

I thought, from your plug'n'play description, that you had ordered an EJK (Gen 3.5) like Gabby and Danresh. i.e. MFG P/N 8120094. Oh well, we live and learn. :)

My bike is definitely smoother now, that the TFI is set-up and the O2 sensor is gone, and after some fine tuning with a CarbTune it is as smooth as any old carburettor twin or competitors EFI twin. I still get a low frequency vibe through the foot pegs at around 4000RPM that's more predominant when it's under high load, I'm guessing this is more of a crank harmonic than a tuning matter, but the vibrations through the seat and bars now are predominantly from the road surface only... I've likened it to having an extra cylinder after riding the Triumph 800 triples; it's smooth like they can be... overall it's quieter too, mechanically and the exhaust note, even with the Fuel Midi cans and K&N filter. Induction noise is more prominent than exhaust note now, under gentle to moderate riding.

Edited by AzzA, 08 November 2012 - 01:27 pm.

gallery_10460_302_12664.png


#75 TKH

TKH

    full o shoite

  • Member
  • PipPipPipPipPipPipPipPip
  • 2,199 posts
  • Location:Preston, NW England
  • TDM model: 2008

Posted 08 November 2012 - 09:06 pm

So not just me thinking it's smoother!

I'm having to change my riding style a little in that I don't have to feather the clutch as much. I've also noticed the bike is better first thing when it's cold. I haven't noticed any spluttering.

#76 TDMTAM

TDMTAM

    Carpe Citizen

  • Member
  • PipPipPipPipPipPipPipPip
  • 4,205 posts
  • Location:Glasgow, Scotland
  • TDM model: 2008

Posted 09 November 2012 - 08:27 am

I am hoping to get one of these for my birthday, still leaning towards the Gen 3.5 plug and play version but may go for the standard EJK to save some money but I am not convinced with the tap in connectons.
The results do seem like this is a worth while mod.
TAM
2008 TDM 900 in BLACK, MRA Vario, DL handguards & more to come
1994 TDM 850 mkI Silver, with Blueflame end can, Gone to a new owner & I kinda miss her!

th_09062006104.jpg th_02012009095.jpg

Only a Biker knows why a Dog sticks it head out the car window

#77 OldGit

OldGit

    Carpe Regular

  • Member
  • Pip
  • 133 posts
  • Location:NW Kent, UK
  • TDM model: 2002

Posted 09 November 2012 - 09:38 am

Tam the supplied taps are very good quality, getting to the loom is easy enough, thanks to Azza identifying the correct wires to tap into is easy, gotta be worth the money saving IMHO.

HTH

Cheers

Nick
Alright Brain, you don't like me, and I don't like you. But lets just do this, and I can get back to killing you with beer.

#78 AzzA

AzzA

    Knows more than an horses arse!

  • Member
  • PipPipPipPipPipPipPipPip
  • 1,548 posts
  • Location:Royston Vasey, Victoria , Australia
  • TDM model: 2009

Posted 09 November 2012 - 02:05 pm

If you're not satisfied with that style of tap-in there are Posi-Locks available from Easter Beaver and other places, or you could solder the connections.

The TFI-1025 is the cheaper tap-on unit that I have documented, the EJK Gen3.5 is the dearer plug'n'play unit that others have bought... but if you use the installation method , as I have outlined in my first couple of posts, the TFI-1025 is actually easier to install than the plug'n'play option because there is less bike to pull apart. You can also make the TFI-1025 switch on/off, but you cannot switch the EJK Gen 3.5... this might be handy if you need to do MOT's every year (dunno; we don't ave em).

gallery_10460_302_12664.png


#79 OldGit

OldGit

    Carpe Regular

  • Member
  • Pip
  • 133 posts
  • Location:NW Kent, UK
  • TDM model: 2002

Posted 12 November 2012 - 09:28 am

Just worked out my mpg - 53.66. That's with seat of the pants tuning, which I think is too rich, and some very hard / fast riding with the local advanced motorcyclists group.
Alright Brain, you don't like me, and I don't like you. But lets just do this, and I can get back to killing you with beer.

#80 AzzA

AzzA

    Knows more than an horses arse!

  • Member
  • PipPipPipPipPipPipPipPip
  • 1,548 posts
  • Location:Royston Vasey, Victoria , Australia
  • TDM model: 2009

Posted 12 November 2012 - 10:11 pm

That 236 miles or 380 kms per tank, that's still quite respectable given the wrist action. You can't be too far off the right setting.

gallery_10460_302_12664.png


Also tagged with one or more of these keywords: jerk, stutter, chug, slow, buck, throttle, EFI, fix, tune, tuning

1 user(s) are reading this topic

0 members, 1 guests, 0 anonymous users